Late Season Whitetail Hunting Tips to Be Successful

Late Season Whitetail Hunting Tips | It’s Not Too Late!

With the end of the calendar year creeping up fast, there is one painful reminder on everyone’s minds: the end of deer season is quickly approaching too. But if you haven’t been lucky enough to take a mature buck (or even a doe for some venison), it’s not too late. Late season deer hunting can be tough – there’s no doubt about it. But it can also be really good. And with the end of the season in sight, what do you really have to lose? If you are in this situation, here are some late season whitetail hunting tips to point you in the right direction.

Late Season Deer Behavior

The challenge with hunting late season bucks is that they are very wary animals, especially compared to when you were hunting the rut. In general, mature bucks have become old deer because they know how to elude us humans. But after months of observing us enter and exit the woods, and maybe even getting shot at, you can be sure they are onto our tactics.

One of the best late season whitetail hunting tips is to really focus on scent elimination. A wise old whitetail definitely will not come into range if he smells your fresh scent trail. Before and while you’re hunting, make sure to use Dead Down Wind® scent elimination products to remove your human odor. This isn’t the time to get sloppy about scent control.

Overcoming the Conditions

The biggest hurdle most people face with late season hunting is beating the weather and staying warm. Depending on where you hunt, the mercury can really nose dive and the winds usually pick up. It’s tough to hunt for very long in those conditions, at least if you’re not prepared. You’ve probably been there before – shivering in a tree, questioning your sanity, checking the clock every 15 minutes…all of that takes away from your hunting concentration. Plus, you can’t kill a deer if you climb down before they get there.

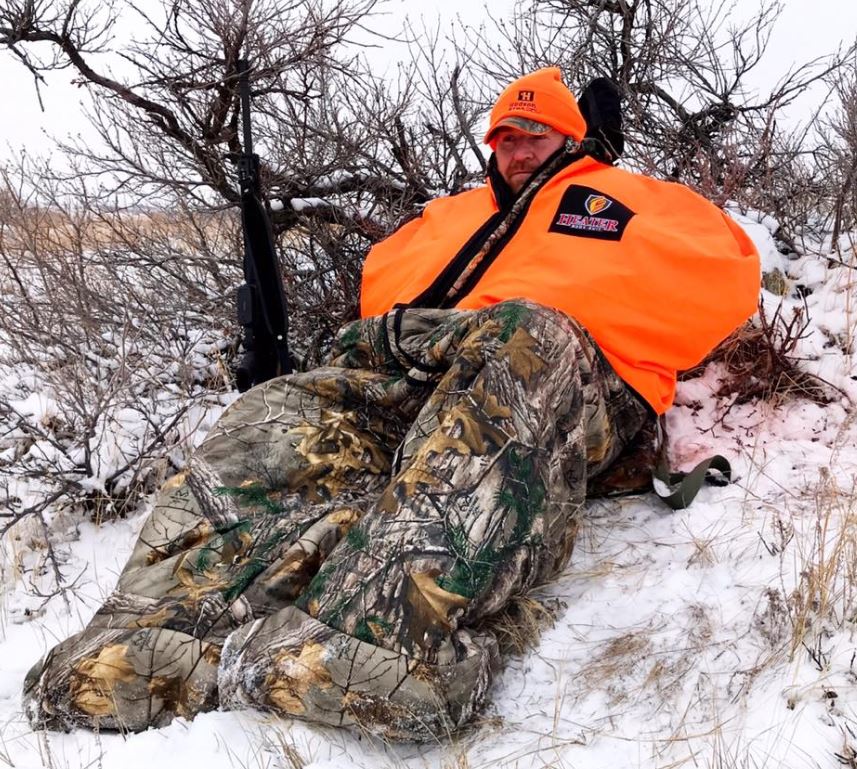
In these cold late season conditions, you really can’t beat the Heater Body Suit® for its ability to keep you in the stand or blind. Traditional hunting clothing doesn’t offer the same insulation value, and it’s a pain to cart in several heavy garments to your tree stand. Simply pack the rolled-up body suit with you and wear lighter clothing so you don’t get sweaty and spread scent everywhere. When you’re in your tree stand and connected with a Hunter Safety System®, pull the body suit on and nestle in for some very comfortable hunting until the end of shooting light. If you’re wondering what late season whitetail hunting tips many professional hunters and outfitters would give you, this would be it.

Choose Your Hunting Locations Well

Deer hunting in the late season is similar in some ways to hunting early season bucks. During the late deer hunting season, bucks have one big weakness: food. With all of their chasing, breeding, and fighting earlier this fall, many bucks have lost a good chunk of their body mass. They need calories fast to put some weight back on before winter really sets in. You can use that weakness to your advantage.

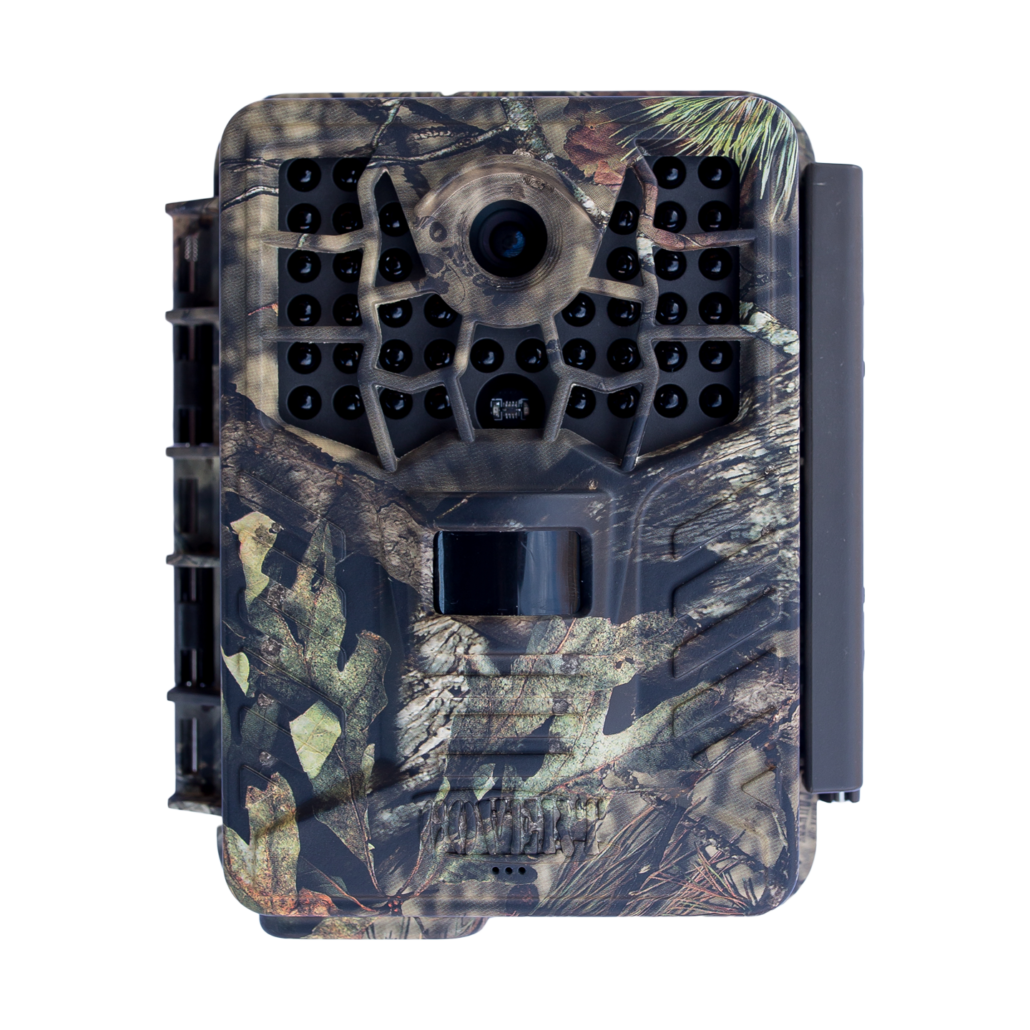
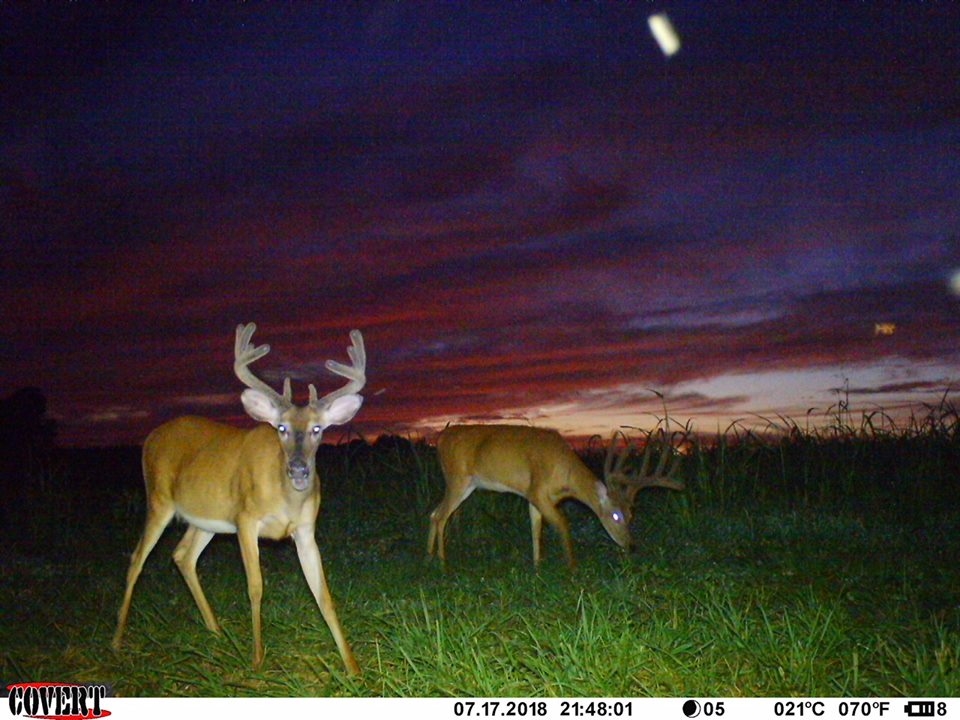
First, find some good food sources that are attracting deer. That might include standing corn or soybean fields, fields with grains as cover crops, or food plots. During the middle of the day, sneak in and hang several trail cameras (Covert Scouting Cameras® are a great option) near the food source along deer trails. After a couple days, you should have a good idea which deer are using it and whether there are any you would like to pursue. Try slipping back in during the day and hanging a stand. Typically, late season hunting is best in the evening near food sources – near, but not directly on them. As easy as it sounds, this could be one of the best late season whitetail hunting tips to help you seal the deal.

We hope you can use these late season whitetail hunting tips to put a buck on the ground yet this 2018 deer season. There are all kinds of deer hunting secrets out there, depending on who you ask. But these deer hunting tips should definitely help. 

Use the Right Choke this Season for Waterfowl Hunting

Shotgun Choke Choice is a Key Part of any Duck Hunt

Waterfowl hunting is tough on gear! The conditions for an amazing day at the marsh, on the lake, in flooded timber, or on the river are the same conditions that will put your gear to the test. Cold fronts, snow cover, and winter storms drive the waterfowl migration south and you can bet you don’t want to miss those new birds arriving to your honey hole. Hunters spend countless hours sorting through decoys, blinds, waders, and calls getting ready for the hunt, but don’t forget to pay special attention to the gun you are taking into the field, and how you expect it to perform. Specifically, make sure you are using the right choke for your waterfowl hunts this season.

Shotgun choke selection is a key decision on any waterfowl hunt. Knowing how your shotgun will perform at various ranges with a selected choke is paramount to successfully bagging more birds. Screw in chokes give hunters the flexibility and confidence to adjust to the hunting situation by having multiple choke choices available. By catering your shotgun choke tube to the hunting situation at hand, you can put more pellets on target when those ducks and geese come cruising in. One key component when it comes to selecting the right choke for the hunt is knowing how your shotgun will perform with each choke tube and shotshell in your bag at various ranges.

Choke tube patterning is an important step to quickly discern how your gun will perform with various shotgun choke tubes at varying distances. A little trigger time at the range will provide incredibly valuable information when it comes time to hunt. Different hunting styles and situations call for changing up your choke tube to be most effective. By patterning your shotgun with choke tubes designed for close, medium, and long ranges, with the ammunition you plan to hunt with, you will have the confidence to get on target. Waterfowl hunting requires non-toxic shot, and many hunters choose steel shot. As a general rule, you should move up one choke size from lead to steel when selecting a choke for your waterfowl hunts. If you would use a full choke with lead shot, move to a modified when shooting steel; from modified with lead to improved with steel, etc. Many manufacturers offer a three pack choke tube package, putting together the appropriate chokes for close range, medium range, and long range situations in one convenient pack; making it easy to use the right tool for the job. Having a three pack variety of choke tubes in your blind bag is one fantastic way to ensure you are ready for whatever the hunting situation calls for.

Close Range Choke Tube

Close Range Hunts

Hunting waterfowl in at close range can produce heart pounding action that is tough to beat. Mallards cupped up and dropping into a small riffle on a frozen river, Canadian geese cruising in fully committed, and ducks dropping into flooded timber are all exhilarating hunts at close range. Targets on close range hunts are generally presented 30 yards and closer, sometimes much closer. It’s critical to select a close range choke for these in your face hunts to be most effective.

Patterning Close Range

To learn how your shotgun patterns a choke and load, take a shot at a paper target with a 15” circular bullseye on a 30” piece of cardboard or paper stock. From a steady rest with a close range, or cylinder (.000 constriction) choke in the shotgun, count the hits on target to determine the effectiveness of the choke tube and shotshell combo. Tweaking variables like shot size and shotshell brand can have an affect on the results. Now that you know what to expect when you’re on target at close range with the appropriate choke, it’s time to try mid range.

Mid Range Choke Tube

Mid Range Hunts

For most of waterfowl hunting, targets are engaged at mid range. Mallards trying to land just outside the decoys, a group of geese making several low passes, or teal fanning up 35 yards from the blind are all real hunting scenarios. Making the most of your shotgun pattern at mid range is critical to the hunt and your success. By taking the time to pattern your shotgun with the ammo you plan to hunt with paired with a mid range choke tube, you will know exactly how your shotgun will perform on target.

Patterning Mid Range

For waterfowl hunters, an improved cylinder (.010) is ideal for mid range targets. 

Patterning an improved cylinder choke is the same process as patterning a close range choke tube, but with a new choke. Position a clean target at 35 yards to simulate hunting at mid range and take a shot from a steady rest. Count the number of pellets on target to determine the choke and load effectiveness. It will be easy to see the pattern has tightened up from the shotgun in the improved cylinder tube, this tightening puts more pellets on target at a longer range.

Long Range Choke Tube

Long Range Hunts

Some days the birds just won’t work like you want them to. The fact is, hunting waterfowl can be tough, and you have to take the shots that are available. Whether you find yourself having to take passing shots at birds coming off a lake, or the birds just won’t commit to your decoys; sometimes you have to take those longer shots. Having the right choke in your shotgun for those long shot hunts is more critical than ever, and patterning your shotgun to understand your effective range will give you the confidence to call the shot.

Long Range Patterning

A long range choke constricts the shot pattern to an even higher degree than close or mid range chokes. Modified (.020) chokes work well for long range shots at waterfowl. The process for patterning a long range choke is the same as a close or mid range choke, but at a further distance. Practice shooting your desired hunting load at 40 yards and beyond to see how your pattern holds together, and to realize your effective range. 

Duck and goose hunting is a ton of fun, and a fantastic way to enjoy the late season outdoors. Waterfowling offers amazing opportunities for fellowship with friends, and is an ideal way to introduce young people to the outdoors and the hunting way of life. When you head out to the duck blind, goose pit, or marsh this season; make sure all your gear is in order, and that you’ve got the right choke for the job screwed into your shotgun. Selecting the right choke tube will help you put more shots on target, and bring home more limits.

Up Your Trail Camera Game for the Rut

Game Camera Strategies for the Rut

It’s November, and the whitetail rut is kicking off. The next several weeks are what deer hunter’s dreams are made of. Mature bucks that have been elusive and nocturnal will be at their most vulnerable, moving in daylight hours and relentlessly chasing does. If you’re like most hunters, this time of year is full of opportunity and frustration. Schedules are hectic, and time in the woods is cherished. You devote weekends, and vacation days; time away from family, and hope that your strategy pays off. One of the best tools to locate bucks during this transition phase, to find their pattern, and have an encounter, is with the use of game or trail cameras.

No doubt, most hunters are familiar with game cameras. Remote, battery powered, motion activated, and time lapse cameras have changed the way we scout and hunt. Through the late summer and early fall, game cameras placed near feed fields, sanctuaries, water sources, and travel corridors help hunters take inventory of what bucks are using the area, and patterns for pre-rut hunting. Game cameras are an extraordinary tool allowing you to scout during nighttime hours, all throughout the day, and with minimal impact and pressure on the hunting area. As the daytime hours shorten, and the calendar turns to November, it is time to up your game camera strategy and use your tools to be amazingly effective.

Use these tips and tactics to best utilize your game cameras and find that mature buck during the rut!

Go Cellular – If you’ve got access to a hunting area that is blessed with cellular coverage, then you are in luck. One of the hardest aspects of running game cameras and checking content is adding pressure to your hunting area. Traditional game cameras store images locally on SD (Secure Digital) cards, and must be retrieved locally from the camera and card. Physically checking images on a camera requires entering your hunting area and risking unnecessary pressure. Hunters must weight risk and reward, is the content on SD card worth risking your hunt?

Game cameras like the Blackhawk LTE line from Covert Scouting Cameras change the rules. These cameras connect to the cellular network and provide instant picture viewing of your hunting area while you are away. Not only do they provide pictures, triggered by motion, heat, or time lapse, but also vital information like weather and wind information. Carefully slip into your hunting area during off peak hours with a favorable wind, and hang a cellular ready camera in a bedding area or on an active scrape for the perfect insight on what is happening and when. Cellular access to certain deer hotspots like a big bucks living room, or a doe bedding area makes the risk of entering once to gain weeks and weeks of insight and details well worth the reward when the rut is going hot and heavy.


Adjust Settings  Most game cameras have a variety of settings, and most hunters don’t take much time to thumb through them. For early season scouting and gathering intel, that isn’t really a big deal. The typical, insert a SD card, add fresh batteries, set the date, and be back in a week is perfectly acceptable in August and September. This, though, this is November! The bucks are on the move, and with limited time to close the deal, it’s time to tweak every knob in your favor.

Those settings like trigger time and photo burst can really add a lot to your scouting and your hunt. Travel corridors, pinch points, and funnels are still critical areas that work amazingly well for game cameras. Making the most of those camera settings in these areas will provide you with the best information. The rut is full swing, imagine your target buck trailing a doe through a pinch point, and your camera is setup to catch the action. If your camera settings aren’t right, there is a good chance you won’t even catch that buck on camera. The doe will trigger the camera and she will be in the frame, the buck will cruise right on by right behind her, and you will be none the wiser. By adjusting the trigger time down to .5 seconds or less, and turning the photo burst up to 8 or higher; you just upped the odds that ole bruiser will show up on camera. Quality game cameras like the Black Maverick by Covert Scouting Cameras offer a variety of options with impressive processors to get the most bang for your buck. Making those adjustments can mean more pictures of just does or non targets, and less time between battery changes, but ensuring those chasing and tending bucks are captured on camera is worth the risk. 


Find the Does – Hunting the rut can be tricky and unpredictable. Deer start to show up in places that deer aren’t supposed to be. Mature bucks are seen in open fields during broad daylight, and trying to pattern a rut driven buck is nearly impossible. One aspect of deer behavior that is most predictable during the rut is the does. Find the does during the rut, and you will find the bucks. Using game cameras to pinpoint doe movement from bedding to feeding areas and the travel ways in between is critical to finding bucks during pre and peak rut. Keep in mind setting up right in a bedding area is an aggressive move, but knowing the does ins and outs of that area is critical when a buck is tagging along.

Go High and Think Outside the Box- 

Avoiding Theft- Like it or not, one of the issues we all have to face when using game cameras is theft. Private property, public property, even private leases are not immune to game camera theft. It’s easy to find a well-traveled game trail, or a recently used whitetail scrape and quickly hang a game camera on the nearest tree; waist or chest high. Odds are any trespasser who comes along that same area will notice not only the trail or scrape, but your camera too.

It may take a little more work and planning, but hanging your camera 7’ or higher, out of the average person’s line of sight, is a first line of defense in keeping your camera safe. Most people walking through deer country are scanning the ground for tracks and scat, and scanning trees for rubs and licking sticks at eye level and below. Using a camera mount like the Tree 60 Camera Mount by Covert Scouting Cameras is an ideal solution to mounting and pointing a camera from an elevated vantage point. Mounting your camera high and pointed down to a travel corridor, bedding area, rub line, or food plot not only gets it out of sight; but makes it much harder to steel if a would be thief decides to nab it.

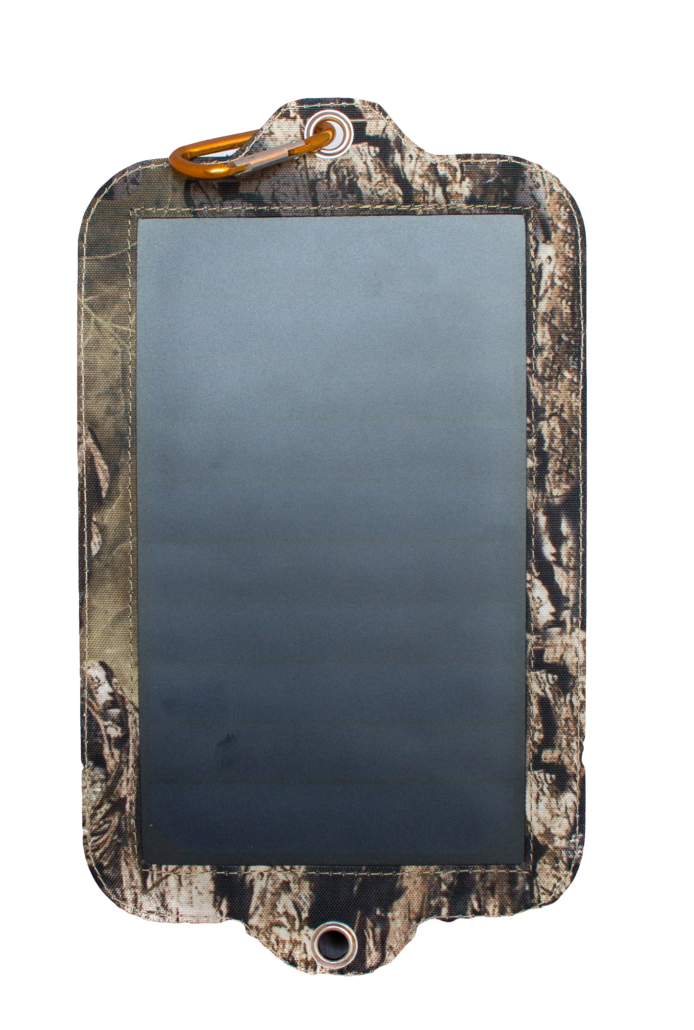
Using Solar – One of the biggest concerns with letting a camera run for an extended time is not checking in on it is battery. So many factors play into battery health and life that they remain unpredictable. One battery in a string can ruin the whole bunch, and the same temperatures that get deer up and moving are the hardest on batteries. A fantastic solution for peace of mind that will let you hang a camera in the key location and wait till the time is absolutely perfect before checking in is solar power. By utilizing rechargeable batteries coupled with a portable solar panel, any camera location that receives a decent amount of sunlight during the day will trickle charge, providing you with the confidence that you will get that buck on camera when he makes his move.

Every deer hunter dreams of time spent in the woods in November. The rut can be full of fast action and big bucks, but don’t let the excitement cause you to lose sight of your scouting game. Keeping tabs on big bucks in your area and knowing where to hunt when the wind is right is sure to make the most of the precious hunting time you have to invest.

Put a Heater Body Suit in Your Hunting Kit

Heater Body Suits Offer Hunting Flexibility

Hunting season brings with it unpredictable weather and widely varying conditions. Hunters have to be ready for everything the hunt can and will throw their way. Being prepared for extreme weather and temperatures is challenging, but not impossible. Building a versatile system that is both efficient and adaptive will make you more effective in the field. A clothing layering system with the right components will help assure you are in the field when the shot presents itself. Dressing in layers, is an effective tactic to match the temperature and activity level during the hunt, and one of the most critical layers in any hunting system is the outer layer. The outer layer of a clothing layering system not only keeps the cold out, but helps keep the heat in.

There are many options on the market today when it comes to outerwear. One amazing option to keep the elements at bay on your next hunt is a Heater Body Suit. Versatile and adaptable, bodysuit type outerwear is much more than protection from extreme cold. A little out of the box thinking will open up great opportunities to help you stay more comfortable and more diligent on the hunt.

  • The Warm Walk In 

Activity level is a key component when it comes to regulating temperature and comfort during the hunt. Dress too warm and the walk in to your stand will have you sweaty before your hunt even begins. Moisture from sweat is a sure way to ruin the hunt, settling in to your stand with damp clothing will quickly cause a chill. Once you are wet and cold on a hunt, it is game over.

Packing a Heater Body Suit along for the walk in while wearing lighter layers for higher activity is an ideal solution. The ability to conveniently pack in a sturdy and warm outer layer to retain heat and shield you from the cold once you are on stand is a perfect solution. Staying dry and regulating body temperature is easily accomplished by layering clothing during the hunt, and using the right outer layer once high exertion into the stand or blind is over.

  • The Damp Cold 

Extremely cold weather adds a level of challenge to any hunt. Sometimes, however, the temperature doesn’t have to drop that much to affect comfort during the hunt. Temperatures in the 20s and 30s might not sound too extreme, but add a level of high humidity to those cool temperatures, and suddenly it’s hard to stay warm.


High levels of moisture, even in the air, greatly reduce thermal insulation properties; making it harder for you to stay warm. Couple cool temperatures with high humidity and a north wind; and you have a perfect recipe for getting chilled during your hunt. The ability to quickly zip into a Heater Body Suit during a cold and damp hunt can be the difference between being on the stand when the hunt comes together and missing an opportunity at a trophy. Locking in your body’s core heat, and blocking a damp chill is critical to hunting those cool mornings and dewy damp afternoons when big game animals are most active.

  • A Solid Investment  

Quality equipment is an investment, and having well-made versatile tools in your kit helps to create adaptability that is a contribution to the hunt. Proven, tough equipment that is built to last will add value to your hunts for years to come and continue to build worth season after season. Products like the Heater Body Suit not only work to keep you warm in the coldest temperatures, but ensure options for hunts into the future.

When you check the forecast for your hunt, or climb out of bed to find cold temperatures, don’t let it keep you from enjoying a comfortable hunt. Preparing for the unpredictable weather that hunting season has to offer can be accomplished by investing in quality layering products that are versatile and flexible. Being prepared for frigid temperatures, damp conditions, and high levels of activity all on the same hunt can be challenging, but outerwear products like the Heater Body Suit are up for that challenge.

Choosing the Right Optic for Your Hunting Rifle

Make the Right Choice for Your Rifle Scope

Having the Right Tools- 

Confidence is one of the keys to success when it comes to hunting. It is important to not only have confidence in yourself and in your own ability, but also confidence in your equipment. Having the assurance that your gear will get the job done when it counts plays an enormous role in a successful hunt. Quality gear from clothing to knives, and rifles to packs takes time to research, acquire, and test. Each hunter develops a toolbox of equipment and gear that works best for them and their hunts and situations.  One of the key components of hunting equipment is the rifle scope.

The Importance of Rifle Scopes- 

In 1844, a civil engineer by the name of John R. Chapman authored a book titled The Improved American Rifle, his book documented the first telescopic sight. The first official rifle scope was made by Morgan James of Utica, New York. Champan and James collaborated to produce the Champman-James sight. This key invention changed the face of rifles and ballistics forever, perhaps more than any other invention of the time. Today rifle scopes come in a variety of magnifications, with various reticles, and an assortment of lens objectives. Many factors come into play for the modern shooter when deciding which scope is best for their rifle and needs.

Rifle scopes have become synonymous with accuracy. Make no mistake, it takes much more than a good scope to build an accurate rifle, however the scope does play a critical role in accuracy and dependability. When paired with a solid, accurate rifle and bullet, choosing the right scope can help make or break a hunt. So which scope is right for your rifle? What factors dictate when one scope design is more effective than another? Choosing the ideal rifle scope for your hunting rifle should take into consideration much more than brand and price.

“All Around Rifle Scope”  

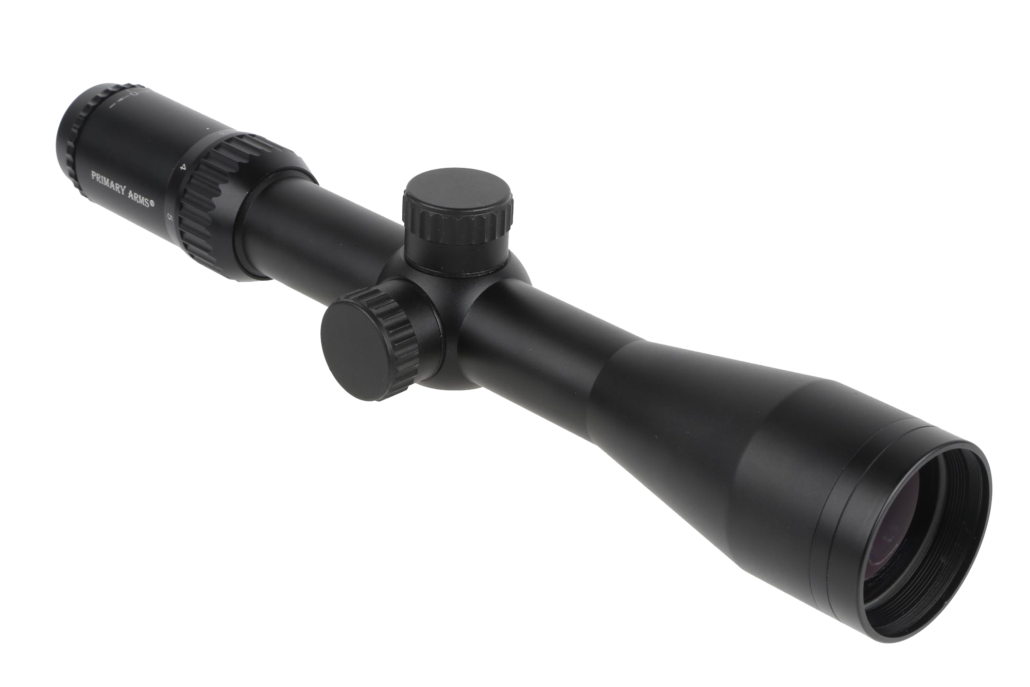
If only one rifle and one scope is in your budget, or you are interested in building the perfect all around general purpose rifle and scope setup, then the old standby 3-9 scope is for you. We will leave the caliber and action type out of it, but for most purposes a 3-9 variable power scope will do the trick.

Look for a scope with generous eye relief, and a medium reticle to save on weight. An all purpose variable scope should be built rugged from high quality aluminum and stout enough to withstand rifle recoil. Hunting rifle scopes should be sealed to prevent fogging and standard ¼ MOA adjustments makes for an ideal all purpose setup.

“Up Close and In Tight” 

Sometimes the best optic for the job at hand is actually less optic, technically, less magnification. A well made variable scope is perfect for most hunting applications, but sometimes less zoom on the variable is just right. If you’re planning on hunting tight cover, heavy timber, or fast action is what you are gearing up for; then the right optic will be critical. Hunting over bait for bears, or whitetails in dense cover can limit shooting distances. Using too much scope too close can make it hard to get on target and make a quick move to seal the deal. A lower powered variable scope in a 1-6 zoom is an ideal fit for those close in encounters where distance is limited and targets are in tight.

A 1-6X24 is an ideal choice for close to medium range targets. Light and compact, these little scopes are small in size but big on performance when it counts. A low magnification rifle scope is easy to bring to the eye, and offers fast focus for in-close encounters. Consider a reticle that is easy to focus on for quick target acquisition. Examine craftsmanship and construction materials as with any rifle scope purchase, and look for ruggedness to ensure dependability.

“Reach Out There” 

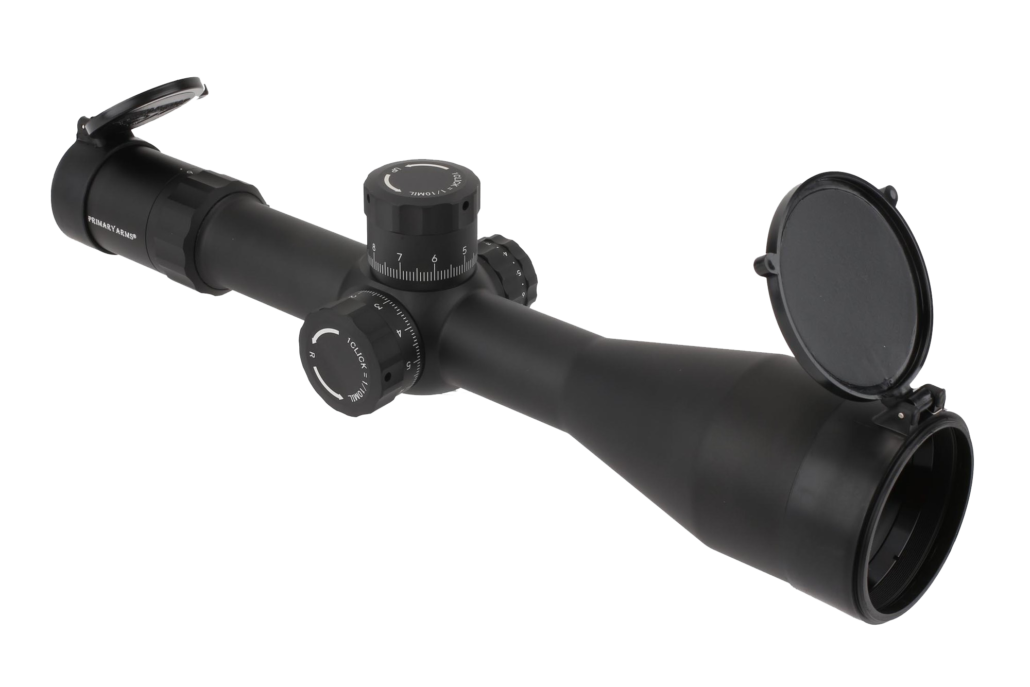
There are times when a hunt requires you to really reach out and make the shot, and make it count. Whether you are hunting open plains, mountain valleys, or desert canyons; closing the distance takes the right scope that you can depend on. Investing in a high quality rifle scope with the magnification to bring targets in close and a large lens objective to gather maximum light will extend your effective range and increase your odds of notching a tag.

Consider a large objective lens of 50mm or better to gather maximum light during dusk and dawn when game animals are most active. The added weight of a larger lens is a compromise when shooting longer distances. High quality glass with impeccable clarity will set better scopes apart from the competition. A high power zoom starting at 4 or 6 power and variable up to 50 or 60 will give you the ability to put the bullet on target when the opportunity presents itself.

The Shooter Truth-

Remember, the perfect rifle built with the perfect scope for the job at hand is only as good as any other tool built to finish a job. It’s up to the shooter to learn the rifle, familiarize themselves with the scope and put in the practice. Having the confidence to make the shot count when the time comes is produced from a combination of trusting your equipment and your own ability. Spending time at the range learning your rifle and scope goes a long way to making it count in the field. Learn the limitations of your hunting rifle setup in various conditions. Make time to practice during low light morning and evening hours, in windy conditions, and a various temperatures. Knowing the limits of your hunting rifle, and your limits as a shooter will provide you with the confidence in knowing when you can make the shot and when you can’t.

Keep in mind your scope’s zero anytime you travel to a hunt. Rifles get pumped, scopes can be affected, and being packed around can take its toll. Sending a few rounds down range on location before the start of a remote hunt can mean the difference between a successful hunt and a missed opportunity. When you consider all the time, money, and energy invested in traveling to hunt, maybe the hunt of a lifetime; a few shots to check your rifle and scope zero only makes sense.

Building a hunting rifle that is designed to deliver when the opportunity presents itself takes a lot of consideration. Using a rifle scope that is accurate, dependable, and designed for the type of hunt you are planning is a keystone of that rifle. If you use the right tools for the job, and do your part to learn the rifle and your own limits, you can build a hunting rifle you can be confident in.

The New Face of Hunting Rifles

New Rifles Meet Old Traditions

For generations the go-to, old reliable deer rifle consisted of a bolt action, lever action, or maybe even a single shot break over or rolling block rifle. These types of firearms still serve as the keystone for many hunters from coast to coast today, and offer reliable and accurate hunting options. For those who are looking to add to their big game tool box, and gear up with a new rifle, the choices may seem endless. Make no mistake, the firearm market is full of terrific selections for today’s hunters in a variety of calibers, actions, and added features that until recently were not possible. Hunters of today have an amazing selection of hunting firearms available, from out of the box MOA bolt action rifles to muzzle loader rifles designed to shoot smokeless powder. The popularity of AR style rifles in recent years has brought that technology mainstream in the hunting community. It’s more common now more than ever to find an AR rifle chambered in .308 Winchester, or .300 blackout in deer camp. Many rifle manufacturers have developed AR style rifle models specifically for hunting. Technology advancements have taken a hold of the firearms industry, and hunters should take notice.


New and Old

As sportsmen and woodsmen there is a responsibility to the pursuit of game animals and a respect owed to cherished traditions. Hunters of today must hope to pass those traditions on to tomorrow’s hunters. Adopting new advancements in tools, materials, and technology for the hunt allows today’s hunters the ability to carry efficiencies and dynamic advantages into the field alongside those traditions and respect for the hunt. Hunters are able to bring together both the old and the new when it comes to their love of the pursuit and the outdoors. One of the ways many modern hunters are adopting technology advancements on the hunt is with AR rifles in the field. One of the leaders in developing those rifles for today’s hunter is Anderson Manufacturing. Anderson Manufacturing is a leader in AR style rifles, producing a first in class product that can be depended on to get the job done.

Anderson Rifles

Anderson Manufacturing and their Anderson Rifle is the perfect example of adopting a leading technology to the hunt and bringing new advancements into our hunting traditions. A leader in advancements of the AR rifle platform, Anderson Rifles are top in their class, offering precision rifles chambered in a variety of calibers from 9mm Luger to .308 Winchester. These rifles are state of the art, unmatched in accuracy, construction, and dependability.

Advanced Rifle Platform

Not only are the Anderson Rifles manufactured with top quality materials and made in the United States, they also offer the world’s only No Lubricant Rifle! Anderson Rifle is the only rifle in the world that never requires any lubricant, no oil, grease, or solvents. Their rifles are treated with the state of the art nanotechnology RF85. Anderson made rifles operate with 85% less friction, are 23% faster than conventional designs, never need oil, and clean up with soap and water.

What is RF85?

An isotropic nanotechnology designed to reduce friction between moving metallic parts, the RF85 treatment process permanently injects calcium into the molecular fabric of metal. When heat and pressure are introduced in a situation like firing a bullet, the calcium nanoparticles elongate, forming a protective barrier. RF85 is in the metal that the rifle is built from, it can’t be washed off or worn out. RF85 is the leading technology in any industry where moving metallic parts come together. There are multiple uses in applications like bearings, cutting surfaces, drive trains, medical application, and engines.

What do the Experts Say?

Oak Ridge National Laboratory, an American national science and technology lab sponsored by the U.S. Department of Energy, is a federally funded facility founded in 1943. With a federal budget of 1.4 billion dollars, the laboratory in Oak Ridge, Tennessee has the budget and facilities to research and test products and processes like RF85. The Oak Ridge facility conducted extensive testing of RF85 friction-reducing treated firearms with amazing results. Their report showed reduced friction coefficients, reduction in wear, and lower operating temperatures with RF85 treated metals when compared to untreated metals.

So What Does It Mean?

By using RF85 technology in their manufacturing process, Anderson rifles never require lubricating. You never need oils or grease. Another fantastic ancillary benefit of no oil is less fouling. Oil attracts and holds powder fouling, dust, carbon deposits, and grime. Firearm lubricants are designed to stick to things like metal parts in actions and barrels, that same adhesion principle causes fouling to stick to the oil. Eliminating the need to oil the firearm also extends the number of shots required between cleanings. Less carbon byproducts and less dirt adhering to the firearm means more trigger time and less maintenance. RF85 treated rifle actions and barrels operate cooler than untreated rifle parts, extending the life of the treated components and your return on investment. When it comes to maintenance and cleaning of your Anderson rifle, the way to go is soap and water. Give the parts a good washing not much different than a sink full of dishes. Make sure everything is dry before reassembly and you are good to go.

Standing Behind Their Product

The good folks at Anderson Rifles stand behind their products 100%. Anderson Rifles are manufactured in the United States under strict tolerances by American workers with premium materials. As if that wasn’t enough, Anderson Rifles sells their firearms with a Limited Lifetime Warranty to the original purchaser. If there is ever a manufactured defect or issue with your rifle, Anderson Manufacturing will stand behind their product and will make it right.

The New Face of Deer Rifles

The principles of pursuing big game remain steadfast and truer than ever. Hunters must manage game populations, habitat and herd health. Woodsmanship strategies like keeping your nose to the wind, knowing the habits of the game you hunt, and conserving resources hold truthful no matter what rifle you choose to hunt with. More and more often, hunters are choosing to pursue big game with AR style rifles. With so many advancements in technology, materials, and craftsmanship; it’s easy to see why. Whatever rifle you choose to carry into the woods this fall, keep the pursuit and passion alive.

Hinge-Cutting for Deer Habitat

Improve Your Deer Habitat with Hinge-Cutting

Quality time in the woods can mean a lot of different things to different people, but one thing is for sure, the condition of habitat can sure improve the value of the time you invest in what you love. Deer hunters understand the value of excellent habitat, the health of the deer herd, and the amount of time deer spend in a specific area. A small parcel of perfect habitat is worth more than acres and acres of poorer country that doesn’t hold deer. Working to improve the terrain you invest your hunting time in not only creates better hunting, but it forms a bond between the hunter and the land. Roots run deep when hunters contribute to their country and in turn the hunt.

Oftentimes, hunters can invest some weekend sweat equity into their hunting locations, and with a few simple techniques improve the deer habitat and the hunt. Don’t be afraid to get out into the woods early, before season, and get dirty. A little sweat and grease never hurt anyone, and with a few simple tools you can really do some good. Roll up your sleeves, put on your work boots, and pull on a pair of gloves to create some habitat improvements that will last for years to come. Tooled up with a simple limb saw, crosscut saw, or a chainsaw; you can spend a little time and make a big difference by hinge-cutting timber strategically.

What is Hinge-Cutting?

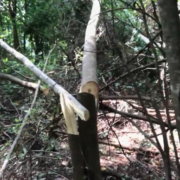
Hinge cutting is an easy to perform micromanagement habitat modification technique that is quick to achieve and cost effective. The technique involves cutting through an established tree part of the way until the tree lays over while still being partly attached to the root structure. Hinge cutting quickly creates a living horizontal habitat that deer love for browse and cover. Hinging timber has multiple effects, and multiple uses. 

Bedding Areas

The horizontal cover created by hinge-cutting creates screening cover, adding security to bedding areas. Deer seek low covered secluded areas that offer hidden bedding areas for rest during daylight hours. Hinge-cutting provides the natural horizontal cover deer are looking for.

Canopy Management

Whitetail deer are natural browsers, seeking weeds, forbes, and legumes as their feed of choice. Heavily timbered areas on your hunting property create a thick canopy that blocks out the nourishment of the sun’s rays. By hinge-cutting openings in the canopy and allowing the sun onto the forest floor, you can create small grazing areas that deer will love. Another plus of canopy management is bringing down the succulent leaves of trees that deer like to feed on. When properly done, hinge cut tree tops will sprout new leaves for many seasons, offering terrific browse.

Travel Corridors and Funnels

Deer are often creatures of habit, traveling the same areas and even pathways time after time. Pre-rut and post-rut bucks can be patterned with some work and care to consider the wind. Hinge-cutting vertical timber into horizontal cover is a great strategy for creating pathways, directing deer travel, and establishing travel corridors in your hunting area.

Cutting Method

Consistently achieving successful hinge cuts takes a little practice and care in the cutting method. Cutting downward at a 45-degree angle produces the best results. Effective hinge cuts are generally made from knee to waist high. Cut ⅔ to ¾ of the way through the tree trunk, cutting just enough to free the top of the tree to fall or be pushed to the ground. Take care to plan your cuts, directing where the tree top will fall.

When and What to Cut

Flexible timber, and woods that don’t split well for firewood make an excellent choice for hinge-cutting. Soft species like elm and poplar are ideal candidates for hinge-cutting. Young saplings and smaller trees with a lot of new growth are the right size for hinge-cutting. Hinge-cutting is a practice that is best to do when the weather is warm and tree fluid is in an active state. Cold temperatures can cause trees to become hard and brittle with a greater chance of breaking and killing the top of the tree.

Putting it All Together

Put in the Work

Hunters who aren’t afraid to get their hands dirty and put in a little work can reap the benefits of habitat improvement, and hinge-cutting timber blocks is a great start. By selecting the right species and size of timber during warm weather you can effectively influence multiple aspects of your hunting property. Hinge-cutting, when done correctly is a great investment of time and resources with a huge payback.

Don’t Fail to Plan

Hinge-cutting is a simple strategy that can positively affect your deer habitat in many ways. Don’t rush in, chopping random trees, but instead take into consideration: bedding habitat, tree canopy, travel corridors, tree species and size when you’re planning your hinge-cutting.

Keep the Hunt in Mind

Don’t let the warm weather and power tools go to your head. It’s important to keep the plan and goal in mind. The end game here is deer hunting, and putting in some work to make this season, and seasons to come more successful. Be ever mindful of your hunting strategy and how it will change throughout the season. Keep in mind details like wind direction, stand placement, food plots, travel ways, and how you plan to get into and out of the hunting area.

It won’t be long until the days grow short and whitetail bucks are in the rut. Hunters all across the nation will be dreaming of time in the woods, taking vacation days, and longing for cold fronts. Some forethought, planning, and muscle in late summer and early fall will go a long way to putting your tag on a deer this season. Whether you are a trophy hunter hoping for a chance at a heavy racked bruiser, a hunter hoping to put meat on the table for your family, or somewhere in between; you can be sure that improving your deer habitat with hinge-cutting will better your chances either way.

Combining Deer Sanctuaries and Minerals

Sanctuaries and Mineral Stations for Deer

With some planning and tactics in late summer, you can use the preseason to accomplish scouting, improve herd health, and develop successful strategies for the upcoming hunting season. With a few tools, you can successfully make a positive impact on your deer herd and your hunting season. Late summer is the ideal time to give the doe and fawn population in your herd a boost before the stress and the rigors of the rut. It’s also the perfect time to ramp up your trail camera strategy and take stock of the summer bucks residing on the property. While you are in the woods, improving the available habitat by strategizing bedding areas, sanctuary, and travel corridors will also enhance your chance of success in the coming months of hunting. Using this combination of trail cameras, habitat improvement, and placing mineral stations for deer in certain areas should pan out for you come fall.

Herd Health

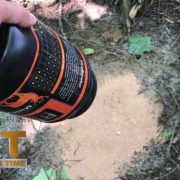
Where legal, providing essential mineral to your deer herd is a critical management tool. This time of year doe and fawn pairs are beginning the weaning process. Whitetail does will begin to wean their fawns. This cycle helps to time the doe ending lactation and begins to help her body condition prior to the breeding season.

The weaning process is stressful to both the doe and the fawn. Making essential minerals available to your herd in a low stress environment is one way to help ease that process. Remember, the mature bucks you are after this season were once fawns and a product of your doe herd. Take care of the females and the fawns to ensure quality deer in the future. Supplementing the herd now, before the stresses of cold weather and the rut is a terrific choice. Mineral stations for deer should be located in low key, quiet areas that deer can feel confident and comfortable in. Offering deer a low stress environment that provides the minerals they need for development is a big herd management win.

Game Camera Strategy

Game cameras have changed the way we hunt arguably more than any other modern tool. Hunters still rely on wind direction, bows, arrows, and rifle calibers that are generations old, and forage that deer feed on as key aspects of the hunt. Portable motion activated cameras have drastically changed hunting, when and where we hunt, and what deer we harvest. The ability to have eyes in the woods without actually being there is huge for the hunter. Photos and video of nighttime movement, evaluation of true herd numbers, and identifying mature deer in an area are now a matter of science and time investment for everyday hunters.

Coupling a trail camera with the mineral station strategy in late summer / early fall is a fantastic use of resources. Any time you enter the woods to place mineral, trim trails, hang stands, or check on cameras you are leaving scent behind. Making use of your time in the woods, and in your hunting area to accomplish multiple goals both limits the human scent in your hunting area and is the most efficient use of your time.

If you strategize and plan correctly, your mineral sites will be in low stress environments where deer feel protected and comfortable. These areas are perfect locations for game cameras as well. By using cameras with long battery life, time-lapse features, and large capacity SD cards, you can limit human interference and scent in the area, and encourage deer to use the mineral. This approach will provide you with a true picture of the area deer herd, the number of does that will be coming into estrus, the bucks who use the area, and the fawn population for seasons to come.

Understanding and Improving Habitat

Hunting properties are dynamic in many ways. Some properties may offer only food sources while another property might be strictly a travel corridor, the best properties have everything the deer need: feed & water, bedding, sanctuary, and travel corridors. By using some management practices hunters can help make the most of their hunting property and the available habitat, and ultimately the hunt.

Deer are quiet, alert, and easily pressured. It’s critical for the deer you plan to hunt to have a sanctuary or a place they can escape human pressure. Big bucks and deer herds can do surprising well in urban environments and on the outskirts of cities if they are provided small blocks of solitude and sanctuary. Imagine what can be accomplished in a more rural environment away from the pressures of the city if a property is managed with the deer herd in mind.

By setting aside sanctuary areas on your hunting property, areas that you do not hunt where deer can find cover, you are encouraging those deer to stay on the property. Keep in mind a few details that can help maximize your deer herd sanctuary areas.

  • Shelter is key, but nothing too thick. By hinge cutting and thinning wood lots and brushy areas you can create the ideal location for deer to bed, loaf, and seek refuge. Opening the canopy to allow browse to grow, and thinning undergrowth to allow deer to see what is around them will encourage deer to utilize the area.
  • Be mindful of the prevailing wind direction during hunting season, the areas you plan to hunt, and their relationship to the sanctuary. Walking in and setting up a hunting stand directly upwind from the area you’ve worked to establish as a sanctuary won’t work out too well. Deer are extremely sensitive to human odor and will quickly learn to avoid the area.
  • Provide travel corridors and trails. Clearing pathways into, through and around the sanctuary area helps both you and the deer. With a few simple tools like limb cutters, a string trimmer, or even a push lawn mower; you can encourage deer to travel in and out of the area in certain ways and following the pathways you’ve created. This type of work needs to be done now, before season so that the deer herd has time to settle back in after the pressure of human work is done.
  • Mineral Sites and cameras placed strategically near, or on the fringe of your sanctuary area utilizing your effective trails and keeping wind direction in mind is the ultimate in property management and pregame herd management tool. Putting together the building blocks of shelter, sanctuary, mineral sites and travel corridors into one game plan with hunting strategy in mind like wind direction and stand placement teamed with trail cameras makes for a dynamic program destined for success. 


Preseason is the perfect time to get out and invest some sweat equity into this falls deer hunts. Keep in mind that a little bit of pressure goes a long way, and the importance of sanctuary for your deer herd when you are out in the woods. Whether you are running game cameras, setting up mineral sites, or improving habitat; be sure you are headed out with a plan. With a little time, some basic strategy, and a few tools you can make some big improvements to your deer habitat and the health of your herd. Good luck this season!

Just Kill’n Time TV Reviews | Quick Sight Elite Peep Sight Review

No Serve Archery Peep Sight | Quick Sight Elite Peep Sight Review

Modern archery setups have come a long way in recent years. Today’s bows shoot faster, flatter and more accurate than ever before. Advancements in limb design, cam design, and riser construction have opened up new horizons to archery enthusiasts that most would never have imagined not too many years ago. New arrow shafts, releases, and broadheads are being released every year offering to help archers in the field. These advancements promise shooters extended ranges and better accuracy, but archery systems still rely on a few static components critical to an archery setup.

One keystone of the archery setup that is both simple, yet vital is the peep sight. The rear peep sight on a compound bow is a small opening or “peep” made into or onto the bow string that acts as the rear sight in a three sight system. A three sight system requires three components: the target, the front sight, and the rear sight. When all three components are lined up, properly sighted in, and adjusted for elevation and distance; the arrow will find its target if the archer does their part.

Peep sights are small, simple, and inexpensive, but at the same time they are critical to the success of any archer. Small variations or movements of a peep sight make a big difference when it comes to the shot. Consistency is key when it comes to any sighting system, and the peep sight on a bow is no exception. In order to achieve maximum accuracy it is critical for shooters to duplicate the shot time after time. Consistent grip, draw cycle, anchor point, and release are paramount to accuracy, all those factors affect the sight alignment, sight picture, and ultimate accuracy. Rugged, dependable, and proficient equipment you can count on offers shooters not only peace of mind, but the ability to make the shot count when it counts.

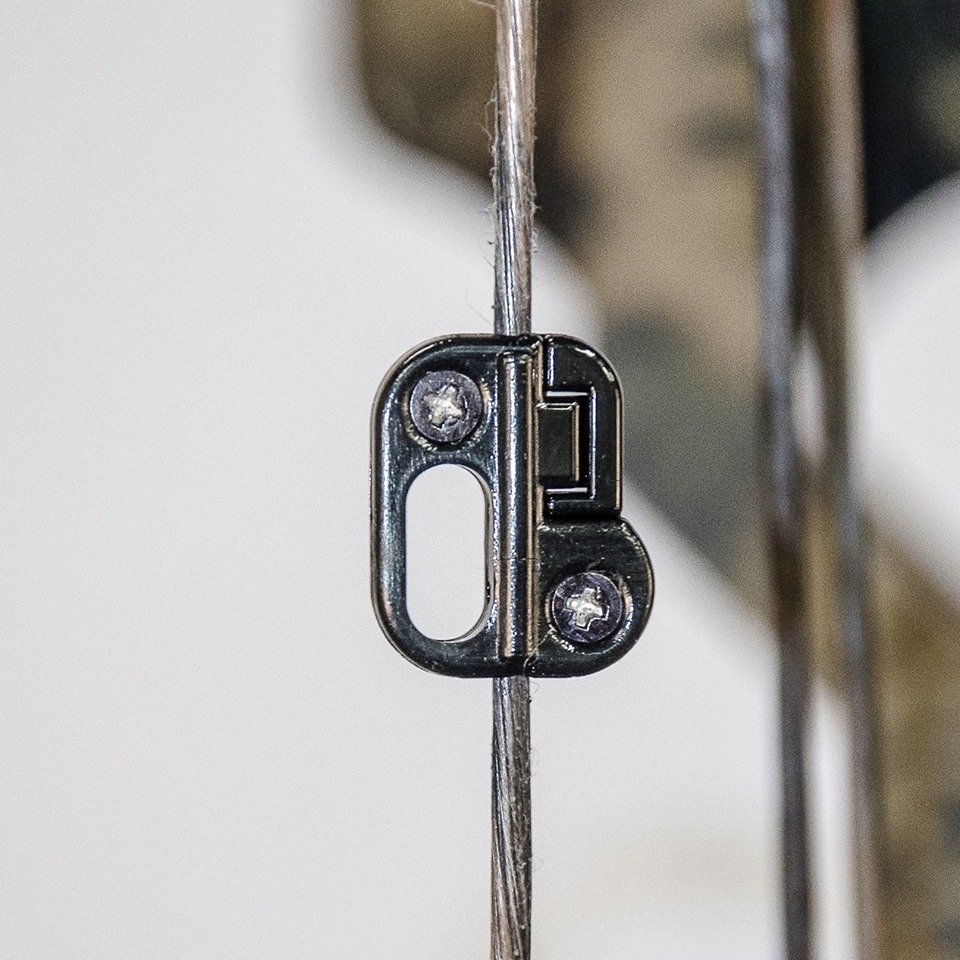
The Quick Sight Elite Peep Sight puts the simple concept of an archery peep in the hands of everyday shooters. Before the Quick Sight Elite Peep, archers lived in a world at the mercy of their local pro shop and a bow press. Owning a bow press for the infrequent task of installing and adjusting a peep sight just doesn’t make sense. At the same time, relying on a shop to make quick adjustments when you are putting in evening and weekend practice time isn’t practical. The Quick Sight Elite solves these problems with a rugged, easy to install and adjust peep sight that requires no bow press or string serving and minimal tools.

Quick Sight Elite Peep Sights weight less than a gram, are built of ruggedized material, and are designed to be self-installed with only a small Philips screwdriver. Small adjustments are easy to make in the field or at the range. The risk of a botched hunt in the field or at a remote location due to an issue with a peep sight is no longer a factor with the Quick Sight Elite. Drop a spare peep into your gear bag, your glove box, your hunting pack, or all three with a small screwdriver and have the peace of mind knowing you can easily save the hunt or tournament with a quick adjustment or new install in the field. Gone are the days of worrying about a trip to the pro shop to adjust a peep after an antelope stalk, the dark walk to a tree stand, or just the in and out of a pickup and affecting your peep and your shot. Quickly adjust for string twist, stretch and humidity with a practical, rugged, and simple design.

With early archery seasons just around the corner for deer, elk, antelope and other big game; there is no better time to make your archery setup work for you. The Quick Sight Elite Peep gives archers that extra edge providing accuracy and peace of mind to make the shot count.