Use the Right Choke this Season for Waterfowl Hunting

Shotgun Choke Choice is a Key Part of any Duck Hunt

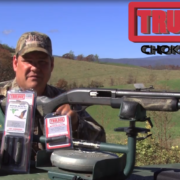
Waterfowl hunting is tough on gear! The conditions for an amazing day at the marsh, on the lake, in flooded timber, or on the river are the same conditions that will put your gear to the test. Cold fronts, snow cover, and winter storms drive the waterfowl migration south and you can bet you don’t want to miss those new birds arriving to your honey hole. Hunters spend countless hours sorting through decoys, blinds, waders, and calls getting ready for the hunt, but don’t forget to pay special attention to the gun you are taking into the field, and how you expect it to perform. Specifically, make sure you are using the right choke for your waterfowl hunts this season.

Shotgun choke selection is a key decision on any waterfowl hunt. Knowing how your shotgun will perform at various ranges with a selected choke is paramount to successfully bagging more birds. Screw in chokes give hunters the flexibility and confidence to adjust to the hunting situation by having multiple choke choices available. By catering your shotgun choke tube to the hunting situation at hand, you can put more pellets on target when those ducks and geese come cruising in. One key component when it comes to selecting the right choke for the hunt is knowing how your shotgun will perform with each choke tube and shotshell in your bag at various ranges.

Choke tube patterning is an important step to quickly discern how your gun will perform with various shotgun choke tubes at varying distances. A little trigger time at the range will provide incredibly valuable information when it comes time to hunt. Different hunting styles and situations call for changing up your choke tube to be most effective. By patterning your shotgun with choke tubes designed for close, medium, and long ranges, with the ammunition you plan to hunt with, you will have the confidence to get on target. Waterfowl hunting requires non-toxic shot, and many hunters choose steel shot. As a general rule, you should move up one choke size from lead to steel when selecting a choke for your waterfowl hunts. If you would use a full choke with lead shot, move to a modified when shooting steel; from modified with lead to improved with steel, etc. Many manufacturers offer a three pack choke tube package, putting together the appropriate chokes for close range, medium range, and long range situations in one convenient pack; making it easy to use the right tool for the job. Having a three pack variety of choke tubes in your blind bag is one fantastic way to ensure you are ready for whatever the hunting situation calls for.

Close Range Choke Tube

Close Range Hunts

Hunting waterfowl in at close range can produce heart pounding action that is tough to beat. Mallards cupped up and dropping into a small riffle on a frozen river, Canadian geese cruising in fully committed, and ducks dropping into flooded timber are all exhilarating hunts at close range. Targets on close range hunts are generally presented 30 yards and closer, sometimes much closer. It’s critical to select a close range choke for these in your face hunts to be most effective.

Patterning Close Range

To learn how your shotgun patterns a choke and load, take a shot at a paper target with a 15” circular bullseye on a 30” piece of cardboard or paper stock. From a steady rest with a close range, or cylinder (.000 constriction) choke in the shotgun, count the hits on target to determine the effectiveness of the choke tube and shotshell combo. Tweaking variables like shot size and shotshell brand can have an affect on the results. Now that you know what to expect when you’re on target at close range with the appropriate choke, it’s time to try mid range.

Mid Range Choke Tube

Mid Range Hunts

For most of waterfowl hunting, targets are engaged at mid range. Mallards trying to land just outside the decoys, a group of geese making several low passes, or teal fanning up 35 yards from the blind are all real hunting scenarios. Making the most of your shotgun pattern at mid range is critical to the hunt and your success. By taking the time to pattern your shotgun with the ammo you plan to hunt with paired with a mid range choke tube, you will know exactly how your shotgun will perform on target.

Patterning Mid Range

For waterfowl hunters, an improved cylinder (.010) is ideal for mid range targets. 

Patterning an improved cylinder choke is the same process as patterning a close range choke tube, but with a new choke. Position a clean target at 35 yards to simulate hunting at mid range and take a shot from a steady rest. Count the number of pellets on target to determine the choke and load effectiveness. It will be easy to see the pattern has tightened up from the shotgun in the improved cylinder tube, this tightening puts more pellets on target at a longer range.

Long Range Choke Tube

Long Range Hunts

Some days the birds just won’t work like you want them to. The fact is, hunting waterfowl can be tough, and you have to take the shots that are available. Whether you find yourself having to take passing shots at birds coming off a lake, or the birds just won’t commit to your decoys; sometimes you have to take those longer shots. Having the right choke in your shotgun for those long shot hunts is more critical than ever, and patterning your shotgun to understand your effective range will give you the confidence to call the shot.

Long Range Patterning

A long range choke constricts the shot pattern to an even higher degree than close or mid range chokes. Modified (.020) chokes work well for long range shots at waterfowl. The process for patterning a long range choke is the same as a close or mid range choke, but at a further distance. Practice shooting your desired hunting load at 40 yards and beyond to see how your pattern holds together, and to realize your effective range. 

Duck and goose hunting is a ton of fun, and a fantastic way to enjoy the late season outdoors. Waterfowling offers amazing opportunities for fellowship with friends, and is an ideal way to introduce young people to the outdoors and the hunting way of life. When you head out to the duck blind, goose pit, or marsh this season; make sure all your gear is in order, and that you’ve got the right choke for the job screwed into your shotgun. Selecting the right choke tube will help you put more shots on target, and bring home more limits.

Up Your Trail Camera Game for the Rut

Game Camera Strategies for the Rut

It’s November, and the whitetail rut is kicking off. The next several weeks are what deer hunter’s dreams are made of. Mature bucks that have been elusive and nocturnal will be at their most vulnerable, moving in daylight hours and relentlessly chasing does. If you’re like most hunters, this time of year is full of opportunity and frustration. Schedules are hectic, and time in the woods is cherished. You devote weekends, and vacation days; time away from family, and hope that your strategy pays off. One of the best tools to locate bucks during this transition phase, to find their pattern, and have an encounter, is with the use of game or trail cameras.

No doubt, most hunters are familiar with game cameras. Remote, battery powered, motion activated, and time lapse cameras have changed the way we scout and hunt. Through the late summer and early fall, game cameras placed near feed fields, sanctuaries, water sources, and travel corridors help hunters take inventory of what bucks are using the area, and patterns for pre-rut hunting. Game cameras are an extraordinary tool allowing you to scout during nighttime hours, all throughout the day, and with minimal impact and pressure on the hunting area. As the daytime hours shorten, and the calendar turns to November, it is time to up your game camera strategy and use your tools to be amazingly effective.

Use these tips and tactics to best utilize your game cameras and find that mature buck during the rut!

Go Cellular – If you’ve got access to a hunting area that is blessed with cellular coverage, then you are in luck. One of the hardest aspects of running game cameras and checking content is adding pressure to your hunting area. Traditional game cameras store images locally on SD (Secure Digital) cards, and must be retrieved locally from the camera and card. Physically checking images on a camera requires entering your hunting area and risking unnecessary pressure. Hunters must weight risk and reward, is the content on SD card worth risking your hunt?

Game cameras like the Blackhawk LTE line from Covert Scouting Cameras change the rules. These cameras connect to the cellular network and provide instant picture viewing of your hunting area while you are away. Not only do they provide pictures, triggered by motion, heat, or time lapse, but also vital information like weather and wind information. Carefully slip into your hunting area during off peak hours with a favorable wind, and hang a cellular ready camera in a bedding area or on an active scrape for the perfect insight on what is happening and when. Cellular access to certain deer hotspots like a big bucks living room, or a doe bedding area makes the risk of entering once to gain weeks and weeks of insight and details well worth the reward when the rut is going hot and heavy.


Adjust Settings  Most game cameras have a variety of settings, and most hunters don’t take much time to thumb through them. For early season scouting and gathering intel, that isn’t really a big deal. The typical, insert a SD card, add fresh batteries, set the date, and be back in a week is perfectly acceptable in August and September. This, though, this is November! The bucks are on the move, and with limited time to close the deal, it’s time to tweak every knob in your favor.

Those settings like trigger time and photo burst can really add a lot to your scouting and your hunt. Travel corridors, pinch points, and funnels are still critical areas that work amazingly well for game cameras. Making the most of those camera settings in these areas will provide you with the best information. The rut is full swing, imagine your target buck trailing a doe through a pinch point, and your camera is setup to catch the action. If your camera settings aren’t right, there is a good chance you won’t even catch that buck on camera. The doe will trigger the camera and she will be in the frame, the buck will cruise right on by right behind her, and you will be none the wiser. By adjusting the trigger time down to .5 seconds or less, and turning the photo burst up to 8 or higher; you just upped the odds that ole bruiser will show up on camera. Quality game cameras like the Black Maverick by Covert Scouting Cameras offer a variety of options with impressive processors to get the most bang for your buck. Making those adjustments can mean more pictures of just does or non targets, and less time between battery changes, but ensuring those chasing and tending bucks are captured on camera is worth the risk. 


Find the Does – Hunting the rut can be tricky and unpredictable. Deer start to show up in places that deer aren’t supposed to be. Mature bucks are seen in open fields during broad daylight, and trying to pattern a rut driven buck is nearly impossible. One aspect of deer behavior that is most predictable during the rut is the does. Find the does during the rut, and you will find the bucks. Using game cameras to pinpoint doe movement from bedding to feeding areas and the travel ways in between is critical to finding bucks during pre and peak rut. Keep in mind setting up right in a bedding area is an aggressive move, but knowing the does ins and outs of that area is critical when a buck is tagging along.

Go High and Think Outside the Box- 

Avoiding Theft- Like it or not, one of the issues we all have to face when using game cameras is theft. Private property, public property, even private leases are not immune to game camera theft. It’s easy to find a well-traveled game trail, or a recently used whitetail scrape and quickly hang a game camera on the nearest tree; waist or chest high. Odds are any trespasser who comes along that same area will notice not only the trail or scrape, but your camera too.

It may take a little more work and planning, but hanging your camera 7’ or higher, out of the average person’s line of sight, is a first line of defense in keeping your camera safe. Most people walking through deer country are scanning the ground for tracks and scat, and scanning trees for rubs and licking sticks at eye level and below. Using a camera mount like the Tree 60 Camera Mount by Covert Scouting Cameras is an ideal solution to mounting and pointing a camera from an elevated vantage point. Mounting your camera high and pointed down to a travel corridor, bedding area, rub line, or food plot not only gets it out of sight; but makes it much harder to steel if a would be thief decides to nab it.

Using Solar – One of the biggest concerns with letting a camera run for an extended time is not checking in on it is battery. So many factors play into battery health and life that they remain unpredictable. One battery in a string can ruin the whole bunch, and the same temperatures that get deer up and moving are the hardest on batteries. A fantastic solution for peace of mind that will let you hang a camera in the key location and wait till the time is absolutely perfect before checking in is solar power. By utilizing rechargeable batteries coupled with a portable solar panel, any camera location that receives a decent amount of sunlight during the day will trickle charge, providing you with the confidence that you will get that buck on camera when he makes his move.

Every deer hunter dreams of time spent in the woods in November. The rut can be full of fast action and big bucks, but don’t let the excitement cause you to lose sight of your scouting game. Keeping tabs on big bucks in your area and knowing where to hunt when the wind is right is sure to make the most of the precious hunting time you have to invest.

Put a Heater Body Suit in Your Hunting Kit

Heater Body Suits Offer Hunting Flexibility

Hunting season brings with it unpredictable weather and widely varying conditions. Hunters have to be ready for everything the hunt can and will throw their way. Being prepared for extreme weather and temperatures is challenging, but not impossible. Building a versatile system that is both efficient and adaptive will make you more effective in the field. A clothing layering system with the right components will help assure you are in the field when the shot presents itself. Dressing in layers, is an effective tactic to match the temperature and activity level during the hunt, and one of the most critical layers in any hunting system is the outer layer. The outer layer of a clothing layering system not only keeps the cold out, but helps keep the heat in.

There are many options on the market today when it comes to outerwear. One amazing option to keep the elements at bay on your next hunt is a Heater Body Suit. Versatile and adaptable, bodysuit type outerwear is much more than protection from extreme cold. A little out of the box thinking will open up great opportunities to help you stay more comfortable and more diligent on the hunt.

  • The Warm Walk In 

Activity level is a key component when it comes to regulating temperature and comfort during the hunt. Dress too warm and the walk in to your stand will have you sweaty before your hunt even begins. Moisture from sweat is a sure way to ruin the hunt, settling in to your stand with damp clothing will quickly cause a chill. Once you are wet and cold on a hunt, it is game over.

Packing a Heater Body Suit along for the walk in while wearing lighter layers for higher activity is an ideal solution. The ability to conveniently pack in a sturdy and warm outer layer to retain heat and shield you from the cold once you are on stand is a perfect solution. Staying dry and regulating body temperature is easily accomplished by layering clothing during the hunt, and using the right outer layer once high exertion into the stand or blind is over.

  • The Damp Cold 

Extremely cold weather adds a level of challenge to any hunt. Sometimes, however, the temperature doesn’t have to drop that much to affect comfort during the hunt. Temperatures in the 20s and 30s might not sound too extreme, but add a level of high humidity to those cool temperatures, and suddenly it’s hard to stay warm.


High levels of moisture, even in the air, greatly reduce thermal insulation properties; making it harder for you to stay warm. Couple cool temperatures with high humidity and a north wind; and you have a perfect recipe for getting chilled during your hunt. The ability to quickly zip into a Heater Body Suit during a cold and damp hunt can be the difference between being on the stand when the hunt comes together and missing an opportunity at a trophy. Locking in your body’s core heat, and blocking a damp chill is critical to hunting those cool mornings and dewy damp afternoons when big game animals are most active.

  • A Solid Investment  

Quality equipment is an investment, and having well-made versatile tools in your kit helps to create adaptability that is a contribution to the hunt. Proven, tough equipment that is built to last will add value to your hunts for years to come and continue to build worth season after season. Products like the Heater Body Suit not only work to keep you warm in the coldest temperatures, but ensure options for hunts into the future.

When you check the forecast for your hunt, or climb out of bed to find cold temperatures, don’t let it keep you from enjoying a comfortable hunt. Preparing for the unpredictable weather that hunting season has to offer can be accomplished by investing in quality layering products that are versatile and flexible. Being prepared for frigid temperatures, damp conditions, and high levels of activity all on the same hunt can be challenging, but outerwear products like the Heater Body Suit are up for that challenge.